Pages

Thursday, September 19, 2013

Pickles, pickles, and... MORE pickles?!


Aren't they beautiful? Seven pint jars of Bread & Butter pickles, 1 pint jar and 12 half pint jars of Sweet Relish, and 9 pint jars of Garlic Dill Pickles. We've given a few of these jars to our family members.

Homemade pickles are the only reason why I grow cucumbers. I have not eaten a fresh cucumber from my garden at all this year.


Last week I cut off all the baby pickles from my dying cucumber plant. I had enough for about a half pint of Sweet Gerkins! I just put it in a pint jar though, because that's what I had. Extra pickle juice is never a bad thing. This brought my pickle jar count up to 30.

I thought my pickling days were over for the year. But instead, Steve's aunt gave us a HUGE bucket of cucumbers from her garden! I haven't weighed it out, but I'm guessing it's at least 12 lbs.


I'll never complain about more pickles. Unfortunately though, I was out of half pint jars and only had a few pint jars left. Most stores are sold out of jars and won't be getting more in, but luckily I was able to find some.

I plan on making more sweet relish and maybe some dill relish with these! One can never have too many pickles.

Tuesday, September 17, 2013

My Absence

It's been a while since I posted something. I'd like to tell you that I was just too busy with housewife stuff (which is true - canned 10 jars of pasta sauce and 29 jars of pickles, and made cold process soap), or that there have been some personal issues (also true - my husband, myself, and our oldest dog have had health issues in the past month. I even hit a milestone and had my very first surgery! Nothing serious; it was elective), but that's not the biggest reason.

The big reason why I haven't updated is that I realized how ugly my blog looked in a blog reader. My pictures are all out of proportion which causes the text to become hard to read. I personally do a lot of my blog reading through a blog reader (RIP Google Reader, you were the best), so I definitely want to make this reading format better.

You know how on the professional blogs their pictures look so nice? They have two or three related pictures side by side in a nice collage. I wanted to do that. So I told myself that I would update all my old pictures before I posted anything new. I just didn't know how to edit my photos into those nice collages. I refuse to buy into the iStuff lifestyle, and I assumed all that iStuff had built-in photo editing programs that can do this. I based this assumption on pictures I've seen from friends with iPhones. I tried to find a program that I could download onto my Ubuntu desktop that would allow me to easily edit my photos, but I couldn't find anything. I tried making a collage template in Gimp, but I couldn't get it to look the way I wanted it to.

Then a few weeks ago I found this website PicMonkey. It's everything I've been looking for! It's not a program to download, it's completely web based. I just upload my photos, put them in the collage, then download it to my computer. So now that I've found this I plan on fixing up the blog.

I'm not trying to be a professional blogger, or the next Pinterest sensation with beautiful photos of food and pretty text overlay. I just want to share my information and hope that it helps someone on a similar path. I'm not trying to make money off of this, and I don't want to bombard my readers with ads ("Buy this!" "Spend your money here!" "How can your life be complete without buying this?!"). I don't agree with most advertising. I've worked in retail, and I hated being told to upsell people. So this may not be the prettiest of blogs, but I'm trying.

Tuesday, July 23, 2013

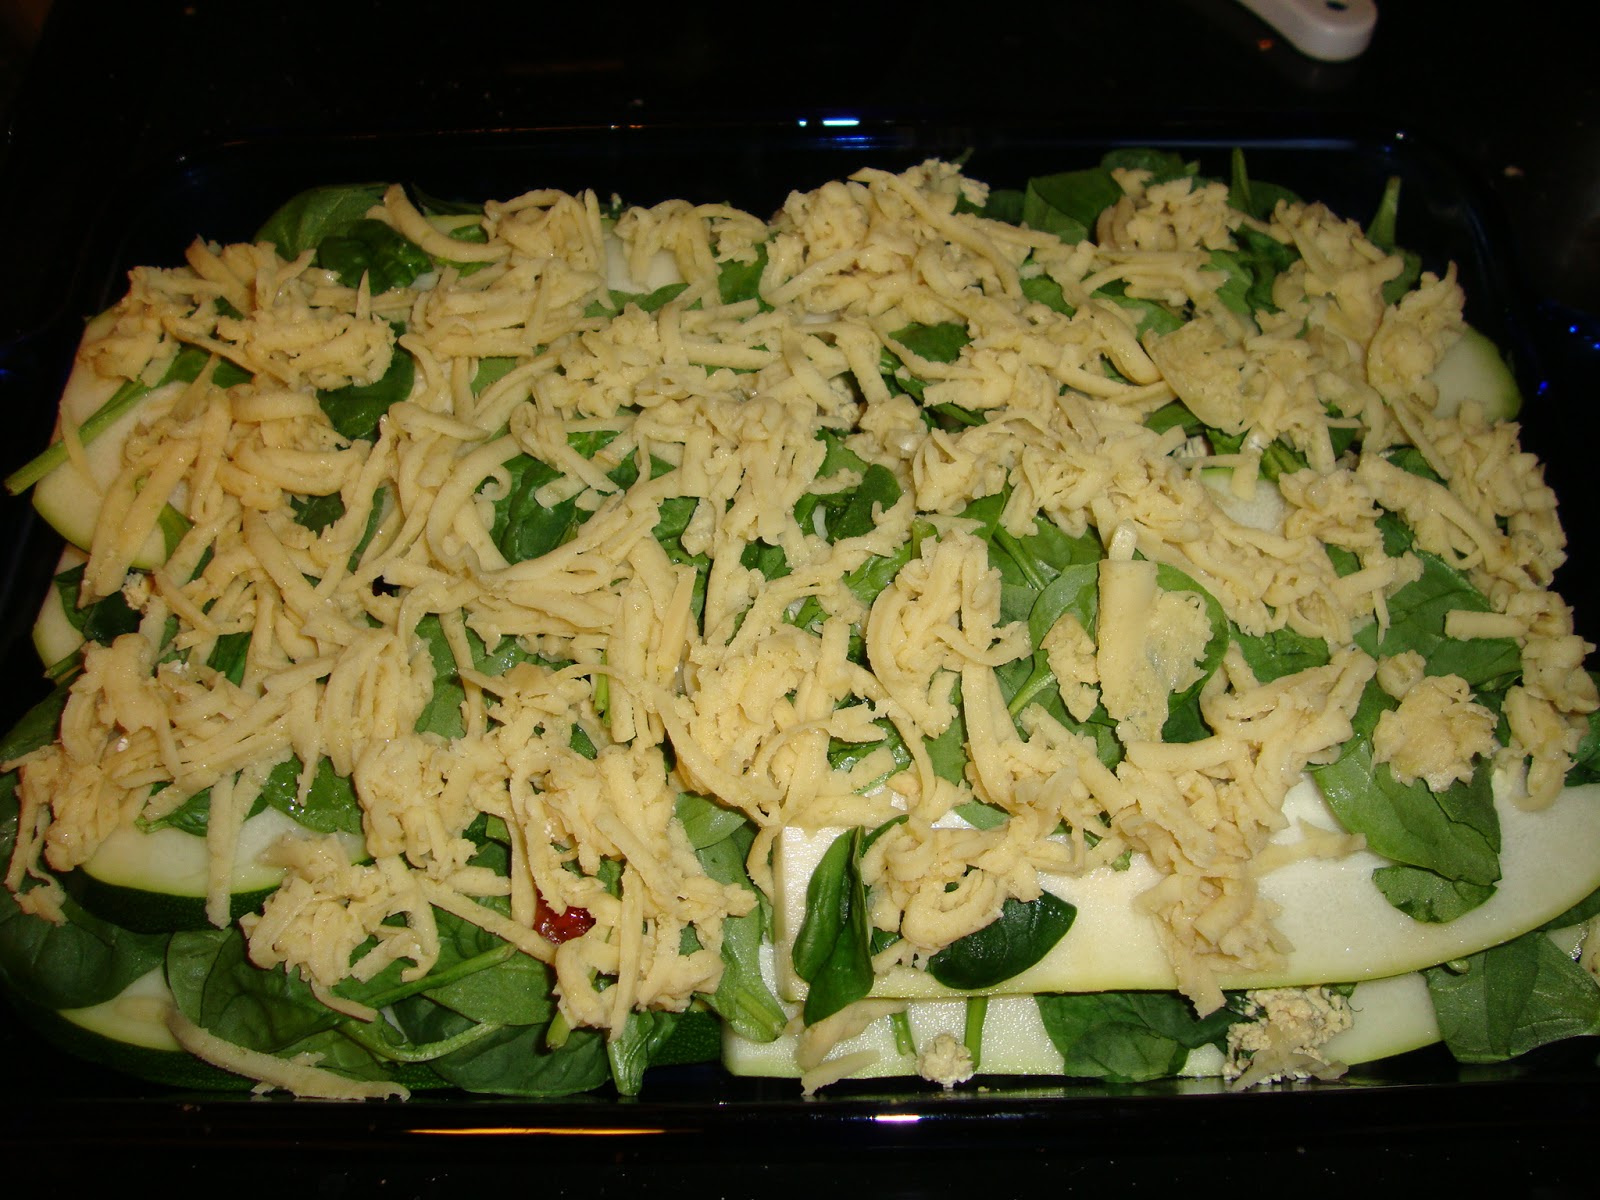
Recipe: Zucchini Lasagna (Vegan, Gluten-Free, Oil-Free, Tomato-Free)


This lasagna doesn't contain any meat, dairy cheese, wheat noodles, olive oil, or tomato sauce. I know that doesn't sound like lasagna anymore, but there's spinach! Omnivores put spinach in their lasagna, right? No, not usually? Oh well, I used a lasagna technique to make it, so I'm sticking with the name.

I'm half Italian. So I (used to) know good tomato sauce. I still miss it, and didn't really want to make a fake tomato sauce from beets and carrots. I've made it before and it's not very satisfying - at least not when tomato sauce is a main ingredient like in pasta. All the recipes I found for a lasagna without tomato sauce were loaded with cheese. I didn't want a heavy, rich lasagna like that. So I came up with this alternative - light but filling, and full of delicious veggies!

The zucchini I used is actually from a friend's garden. And it was HUGE! I should have taken a picture before I cut it, but I forgot. You can see by the size of the noodles I got how big it was. I didn't even use half of the zucchini for this.

The main components of this lasagna are:
  • Zucchini cut into wide, thin noodles
  • Lightly steamed spinach (about 5oz, fresh)
  • Tofu Ricotta by Oh She Glows (I omitted celery, oil, and red pepper flakes)
  • Roasted red peppers (2 peppers, roughly chopped)
  • Artichoke (1 can, roughly chopped)
  • Vegan mozzarella (I changed the flavors a bit for Smoked Coconut Gouda by Vedged Out)
I started out by slicing the zucchini into wide, thin strips and setting them in a colander in the sink. I sprinkled some salt on top and let it sit for a while to release some of its moisture.

To assemble the lasagna:
  1. Place a layer of zucchini noodles in the dish and cover with a bit less than half of the steamed spinach.

  2. Spread half of the tofu ricotta on top, and add half of the roasted red peppers and artichoke.

  3. Add another layer of zucchini noodles and most of the spinach that's left. Cover with the rest of the tofu ricotta, roasted red peppers, and artichoke.

  4. Add the final layer of zucchini noodles and the rest of the spinach. Top with grated vegan mozzarella cheese.

  5. Bake at 400°F for 30 minutes. Serve immediately.

Steve rated this lasagna a 9.2/10! He loved it, and he's not a huge zucchini fan. I loved it too, and will definitely make this again to use up all the zucchini we have.

Monday, July 15, 2013

Solar Cooking: Bran Flakes and Beans

Today was a high of 90°F and very few clouds. Perfect weather for solar baking!

I decided to try out a couple things: cooking dried beans and baking bran flakes. I also made some solar reflectors to concentrate sunlight. I glued aluminum foil to cardboard.


Dried Beans

I found an entry on eHow about how to do this, so I figured I'd try it out. My crock pot is black and the perfect size for cooking 1lb of dried beans. So last night I soaked 1lb of black beans in my crock pot. This morning I drained the beans and added warm water, then I had it outside by 9am with my new reflectors.


I used a glass jar to support the reflectors and keep them from sliding. Eventually I'll come up with a better system.

This was unsuccessful. The water never got hot enough to cook the beans. I highest temperature I measured was 180°F at 3pm when I brought it inside.

I then stuck the pot in my crock pot and turned it on to cook. Unfortunately, I forgot about the beans and overcooked them. Now they're a bit mushy. Eh, whatevs. Mushed black beans are great for taco filling and brownies, so no big loss.

So even though it didn't work, I still think it was worth it to try it out.

I have ideas to build a better solar oven. Hopefully I'll try it out later this week since it's going to continue to be hot.

Bran Flakes

I needed to make Steve some bran flakes to take into work, and these seemed like a great thing to bake outside. Turns out I was right!


I'll post another entry with the bran flake recipe I use. But basically, you mix all the ingredients, roll it out onto some parchment paper, bake that at 350°F for 5-10 minutes (until the the edges get crispy), rip it up into flakes, then bake that at 275°F for 20 minutes (stirring every 5 minutes).

After I rolled out the mix, I let it sit outside for about an hour. Then I ripped it up, and let it sit out for a few more hours. And they were just as good as baking them in the oven! (Ok, Steve said they were a little chewy. So I'll just leave them out a bit longer next time.)

I didn't have to turn on my oven on a 90°F day for it, so that's a success to me!