Pages

Monday, December 30, 2013

Homemade Christmas Gifts

Last year Steve and I started the tradition of making all of the Christmas gifts for our families. We're not really fans of the commercialism side of the holiday. The "Buy this now! Shop shop shop!" aspect of the holiday really gets to me. I don't want a family member to buy me something just because it's Christmas and that's what you're supposed to do. I'd rather get a personal and thoughtful gift (or nothing, I'm fine with not receiving gifts) than a "black Friday deal" that's of no use to me.

I spent a few months making all our gifts. It does take more planning and more time than going into a store, seeing something on sale, and buying it because "so-and-so might like this. I need to get them something". The latter sounds too impersonal to me.

Here are some pictures of the gifts we made. I added links to recipes I used in case you are inspired to start making your own gifts.

A family birthdays and wedding anniversaries calendar for our parents:


This idea came from Pinterest. I didn't follow a tutorial for it. I made the colors match our parents' houses. My parents are currently re-modeling their kitchen, and my mom wants to decorate her new kitchen in sunflowers.


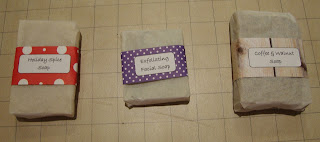
Three kinds of cold process soap:


Lotion and lip balm:

  • Cocoa Rose Lotion Bar (made vegan by using candelilla wax* instead of beeswax. I used non-infused grape seed oil and rose essential oil)
  • Chocolate Peppermint Lip Balm (made vegan by using candelilla wax* instead of beeswax, and leaving out the honey. I think this recipe turned out a bit too soft for lip balm tubes, and I would add more wax if I made it again)
*Candelilla wax is substituted for beeswax by using 1/2 the amount that is called for. For example, the lotion recipe called for 3oz of beeswax and I used 1.5oz of candelilla wax as a substitute.


Tea blends:
  • organic Earl Grey tea with Orange Mint* (blend - 4:1 earl grey:orange mint)
  • Sage* & Rosemary* black tea (blend - 1:1:2 sage:rosemary:black tea)
  • Lemon Balm* & Chocolate Mint* herbal tea (blend - 2:1 lemon balm:chocolate mint)
*grown in my garden over the summer

I sewed up little tea bags from coffee filters. I basically folded a filter in half, then sewed a small box into it with the top open. I sewed it shut after filling it, then folded and stapled it with a thick thread for the tea tag. Sewing the bags was time consuming. If I keep making teas, I might just give a jar of loose tea with a nice reusable infuser.


Various nut butters:

And 19 hockey skate "stockings" for Steve's hockey/LAN buddies:

We had 16 people at our house for a week for the LAN (with most of those people having been on the hockey team at some point). I displayed all their stockings on the mantle. I also made 3 more for people that are currently on the hockey team but not attending the LAN.

I modified a tutorial I found online for a basic stocking to make it into a hockey skate. I didn't take too many pictures of my process though. If I end up making more for other team members, I'll take pictures and post a tutorial of it.


Please consider making gifts. It is very rewarding and people like to get personal gifts. Plus it's just nice to hear "Wow, you made this?!"

Friday, December 6, 2013

Homemade Cleaning and Beauty Products

One of our many goals is to start making most of our cleaning and beauty products. This seems to be a trend now and it's easy to find a lot of recipes online. It can be a little overwhelming if you're just starting out, so here's a good tip:

Never assume that anyone who writes a blog (including me) knows what they're talking about.

Read everything with a grain of salt, and do more research if something about a recipe seems off. Personally, I take a practical approach to everything. I'm not jumping head-first in the "everything homemade" bandwagon. If something makes sense to make it at home, then I will do that. And if there is science behind why and how something works (both homemade and commercial), I want to know that. I'm a nerd; I like researching stuff.

Someone may claim that their recipe is the only cleaning product you'll ever need, but it may not even work because they don't understand the science behind it. I've read so many cleaning recipes online that say to mix baking soda and vinegar to make a "super-powerful, homemade" all-purpose cleaner that is supposedly better than commercial cleaners. It bubbles; it must be cleaning, right? The chemical reaction of mixing baking soda and vinegar produces carbon dioxide gas and sodium acetate in water. Aqueous sodium acetate is not some magical cleaner. It's basically salt water.

I've tried the baking soda and vinegar drain cleaner several times when my drains become clogged. It never really worked for me. It may have broken up the clog a bit, but not enough to say that it worked. I still had to use commercial drain cleaner to get it out. I haven't found a good homemade solution to that one.

Here is some science.

I've also seen a lot of recipes that recommend mixing castile soap and vinegar to make a cleaner. Here is a statement from Dr. Bronner's about why that is not a good idea.

Baking soda is a great cleaner. Vinegar is a great cleaner. Castile soap is a great cleaner. Just don't mix them. All you really need is one of these, with maybe a bit of water. You could also clean with baking soda or castile soap first, and use vinegar to rinse. Keep it simple. You don't need fancy homemade cleaners with expensive essential oils to get the job done.

While I do use essential oils in some of my beauty/cleaning products, I do it mainly because I like the scent. I prefer to use an oil actually made from the plant and not a synthetic fragrance oil. I understand that essentials oils do provide some health benefits, but I haven't researched that enough myself. I know that these plants have health benefits, I'm just not sure how much of those benefits remain in the essential oil. It's up to you whether you'd like to use them or not. I'm not here to give you a list of "The Top 10 Essential Oils You Should Be Using Right Now!"


Why Homemade?

There are a number of reasons why people are switching to these homemade products. These are our biggest concerns, and why we're starting to make some beauty/cleaning products at home:

Knowing the Ingredients

Being vegan, we don't want to use any animal products. There are the obvious ingredients such as beef tallow (animal fat, commonly found in bar soaps), beeswax (commonly found in lip balm), honey, and goats milk. There are also not-obvious ingredients such as steric acid. We choose to avoid palm oil as well, which is also in a lot of bar soaps. While palm oil itself is vegan (it's not from animals), the farming of it is devastating to orangutans. Also, a lot of commercial beauty/cleaning products are tested on animals, which is something that we want to avoid as well.

A lot of commercial "soaps" (like Dove) are not actually soaps, but are detergents made with synthetic, petroleum-based ingredients. They're not made with fat/oils anymore, like how traditional soap was originally made. It's just a personal preference of mine to use soap made from plant oils rather than petroleum-based synthetics.

There are also some health reasons. I'm not going to list off all the harmful "chemicals" (everything is a chemical, good and bad) that should be avoided just because you can't pronounce them. I just want to avoid additives. I don't need my soap to contain sodium lauryl sulfate (SLS) so it will have a pretty lather. Lather doesn't clean, it's just for aesthetics. I don't believe that all bacteria is bad, so I don't want antibacterial agents added in. I just want a simple soap that cleans. I don't care how pretty looking or nice-smelling it is, or that it kills 99.9% of bacteria (some of which is beneficial bacteria to us). I just want it to work. Plain and simple.

Financial Reasons

I don't bring in any money being a housewife. Instead, my contribution is helping to save money by putting my time and effort into making things/food as opposed to buying it already made. I could drive to Target and buy a box of Tide for $12, or I could make the same amount of laundry detergent (in terms of washer loads) with ingredients already in my house that would have cost about $1.25 in supplies. Sure, it takes up some of my time to put it together, but I feel like it's worth my time.


Why Not Homemade?

I am by no means claiming to be an expert on homemade beauty products. I've only made a handful of things. Everything that I'm saying is based off of what I've read about the safety of homemade products. Please, don't just blindly take my word for this. Do the research yourself if this is something you're concerned about. And let me know if I've made an incorrect assumption!

Most commercially made beauty products contain preservatives. Some preservatives are also irritants, and this is part of the reason why people would like to avoid them. Preservatives also do some good things - they extend the shelf life of products and stop harmful bacteria from growing.

Bacteria likes to grow in a wet environment. Tap water contains bacteria. So many recipes I've read online say to use water in the product. There is no mention about using distilled water or bacteria growth in these recipes. Some may say to add a "natural preservative" like rosemary oil or grapeseed extract, but I haven't researched these myself. I don't know if they actually work. I'm not going to trust the word of a blogger (who might even be paid to sell these essential oils, like Mary Kay ladies) on something like that. The product could also be kept in the fridge to prevent bacteria growth, but I don't want to deal with running downstairs to grab all my soaps out of the fridge before I take a shower.

I try to take a practical approach to this. If I can make something easily and safely at home, I'm going to do that. Even if it's a little bit more expensive than buying the commercial product, I like that I made it and I can control the ingredients. I also realize that some things are just not worth it to make at home.

Products that I WILL NOT make at home, and will buy commercially:

Sunscreen

There are a lot of homemade sunscreen recipes floating around on the blogs. This is not something I want to mess with. Sunscreen is tested to ensure it provides the SPF that it claims. When making it at home, there is no way to know what the SPF it provides because it's not possible to do these tests at home. I don't want to make something at home and hope it protects me from skin cancer. That's the whole purpose of sunscreen!

Toothpaste

Kinda along the same lines of sunscreen. I use this to protect my teeth so they don't rot away. I'd rather use something that's been tested. There are some brands that don't contain SLS or fluoride, so I'll buy those. Plus, most of the toothpaste recipes I see online contain baking soda and salt which sound SUPER abrasive to me! I don't want to scratch up my teeth.

Liquid based beauty products

This includes liquid soap/shampoo and creamy lotion/conditioner. This risk is just too great for me with regards to spoilage and growing unwanted bacteria. I don't want to keep my shampoo in the fridge in between showering. I'll forget it's in there until I get under the water.

Saline Solution for Contacts

I've read recipes on several blogs for homemade saline solution for contacts. Yes, seriously. Some people are making a solution to put in their eyes. What?? No. No no no. I will NOT be making a saline solution and hope that I sterilized everything correctly so my husband can put it in his eyeballs (he wears contacts, I don't). That's serious stuff, to be putting something in your eyes that even has a chance of growing unwanted bacteria. Generic brand contact solution is not expensive, and it's not full of "weird chemicals". This just makes no sense to me. Something like this has too big of a risk. Use common sense, people. Don't be dumb just for the sake of "homemade" and "chemical-free".


What I am Making

This is what I've made so far. Hopefully this list will grow to include other products.

Cold Process Soap

Cold process soap is made by mixing sodium hydroxide (lye) and distilled water. This is then mixed with oils and poured into molds. The oils and lye will react in a saponification process which is what causes the soap to become solid. I use distilled water in the soaps I make. Distilled water is pure and doesn't contain bacteria or minerals like tap water does. Also, (I think) any bacteria in the water would have been killed in the saponification process. Cold process soap needs to cure for about 4-8 weeks, and during this time all water is evaporated from the soap to make it more solid. If the finished soap is left in a puddle of water between uses it can still grow bacteria because of the wet environment and lack of preservatives. I leave the soap on a well-drained rack in the shower.

I will make bar soaps and shampoo bars at home. I don't see body soap and shampoos as being so important that I must buy them commercially. It's not like using a homemade shampoo bar is going to make my hair fall out. It might not be as clean as I'm used to, but I can figure out a recipe that works for me.

Powdered Laundry and Dish Detergent

I make powdered detergents to use in our washing machine and dishwasher. These are usually made from baking soda, washing soda, and salt. I also use vinegar in the rinse cycle to help rinse off any residue from the clothes/dishes.


Hopefully this has helped someone who is interested in homemade products. Just be smart about it.

Friday, November 8, 2013

Sometimes I build stuff

Yesterday I woke up and had the urge to build something. I like working with my hands, and was just in the mood to make something other than food. So I built a small shelf.

I'm also in a very good mood this week and got a lot of stuff done around the house. I've had back pain on and off for 2 years, and was finally diagnosed with a large herniated disc (yay?). So I spent a month at physical therapy and that has helped tremendously! And last week Steve and I went on our honeymoon to the Blue Ridge Mountains, and it was perfect. Lots of hiking and sight seeing, and eating delicious vegan meals in Asheville. Hard to be in a bad mood after that.

Back to what I built. I'm very grossed out by pet food. It smells bad, it looks bad, I don't want it near my cooking equipment or my food. I think because it has meat is why I find it so disgusting. Steve likes to mix a can of wet dog food in with their dry food, so he needs counter space to mix it up. And I don't want to share. So I cleaned off the edge of one of our counters for him to use. But with the dog food bowls, dog food cans, their pills, and pill pockets, it gets messy very quickly - and Steve would gradually start to take up more counter space for dog food. Ew.


So, I built a small shelf to store the food and pills, and to section him off from the rest of the counter. I measured and sketched out a little diagram of what I wanted. Luckily, we had some spare wood in the garage that I was able to use. I had to saw off a little bit. That wasn't too much fun because we don't have an electric saw. We just have a hand-me-down hacksaw from Steve's grandpap. We also don't have saw horses, so I sat down and sawed over the trashcan. We really need more tools.


After everything was cut, I sanded and screwed it all together, and then painted it with some paint we had lying around. So this project didn't cost me anything, and I used stuff that was probably going just be thrown away at some point.


It's not perfect, but it does what I wanted it to do. And I got to feel like this guy while making it.

Thursday, September 19, 2013

Pickles, pickles, and... MORE pickles?!


Aren't they beautiful? Seven pint jars of Bread & Butter pickles, 1 pint jar and 12 half pint jars of Sweet Relish, and 9 pint jars of Garlic Dill Pickles. We've given a few of these jars to our family members.

Homemade pickles are the only reason why I grow cucumbers. I have not eaten a fresh cucumber from my garden at all this year.


Last week I cut off all the baby pickles from my dying cucumber plant. I had enough for about a half pint of Sweet Gerkins! I just put it in a pint jar though, because that's what I had. Extra pickle juice is never a bad thing. This brought my pickle jar count up to 30.

I thought my pickling days were over for the year. But instead, Steve's aunt gave us a HUGE bucket of cucumbers from her garden! I haven't weighed it out, but I'm guessing it's at least 12 lbs.


I'll never complain about more pickles. Unfortunately though, I was out of half pint jars and only had a few pint jars left. Most stores are sold out of jars and won't be getting more in, but luckily I was able to find some.

I plan on making more sweet relish and maybe some dill relish with these! One can never have too many pickles.

Tuesday, September 17, 2013

My Absence

It's been a while since I posted something. I'd like to tell you that I was just too busy with housewife stuff (which is true - canned 10 jars of pasta sauce and 29 jars of pickles, and made cold process soap), or that there have been some personal issues (also true - my husband, myself, and our oldest dog have had health issues in the past month. I even hit a milestone and had my very first surgery! Nothing serious; it was elective), but that's not the biggest reason.

The big reason why I haven't updated is that I realized how ugly my blog looked in a blog reader. My pictures are all out of proportion which causes the text to become hard to read. I personally do a lot of my blog reading through a blog reader (RIP Google Reader, you were the best), so I definitely want to make this reading format better.

You know how on the professional blogs their pictures look so nice? They have two or three related pictures side by side in a nice collage. I wanted to do that. So I told myself that I would update all my old pictures before I posted anything new. I just didn't know how to edit my photos into those nice collages. I refuse to buy into the iStuff lifestyle, and I assumed all that iStuff had built-in photo editing programs that can do this. I based this assumption on pictures I've seen from friends with iPhones. I tried to find a program that I could download onto my Ubuntu desktop that would allow me to easily edit my photos, but I couldn't find anything. I tried making a collage template in Gimp, but I couldn't get it to look the way I wanted it to.

Then a few weeks ago I found this website PicMonkey. It's everything I've been looking for! It's not a program to download, it's completely web based. I just upload my photos, put them in the collage, then download it to my computer. So now that I've found this I plan on fixing up the blog.

I'm not trying to be a professional blogger, or the next Pinterest sensation with beautiful photos of food and pretty text overlay. I just want to share my information and hope that it helps someone on a similar path. I'm not trying to make money off of this, and I don't want to bombard my readers with ads ("Buy this!" "Spend your money here!" "How can your life be complete without buying this?!"). I don't agree with most advertising. I've worked in retail, and I hated being told to upsell people. So this may not be the prettiest of blogs, but I'm trying.

Tuesday, July 23, 2013

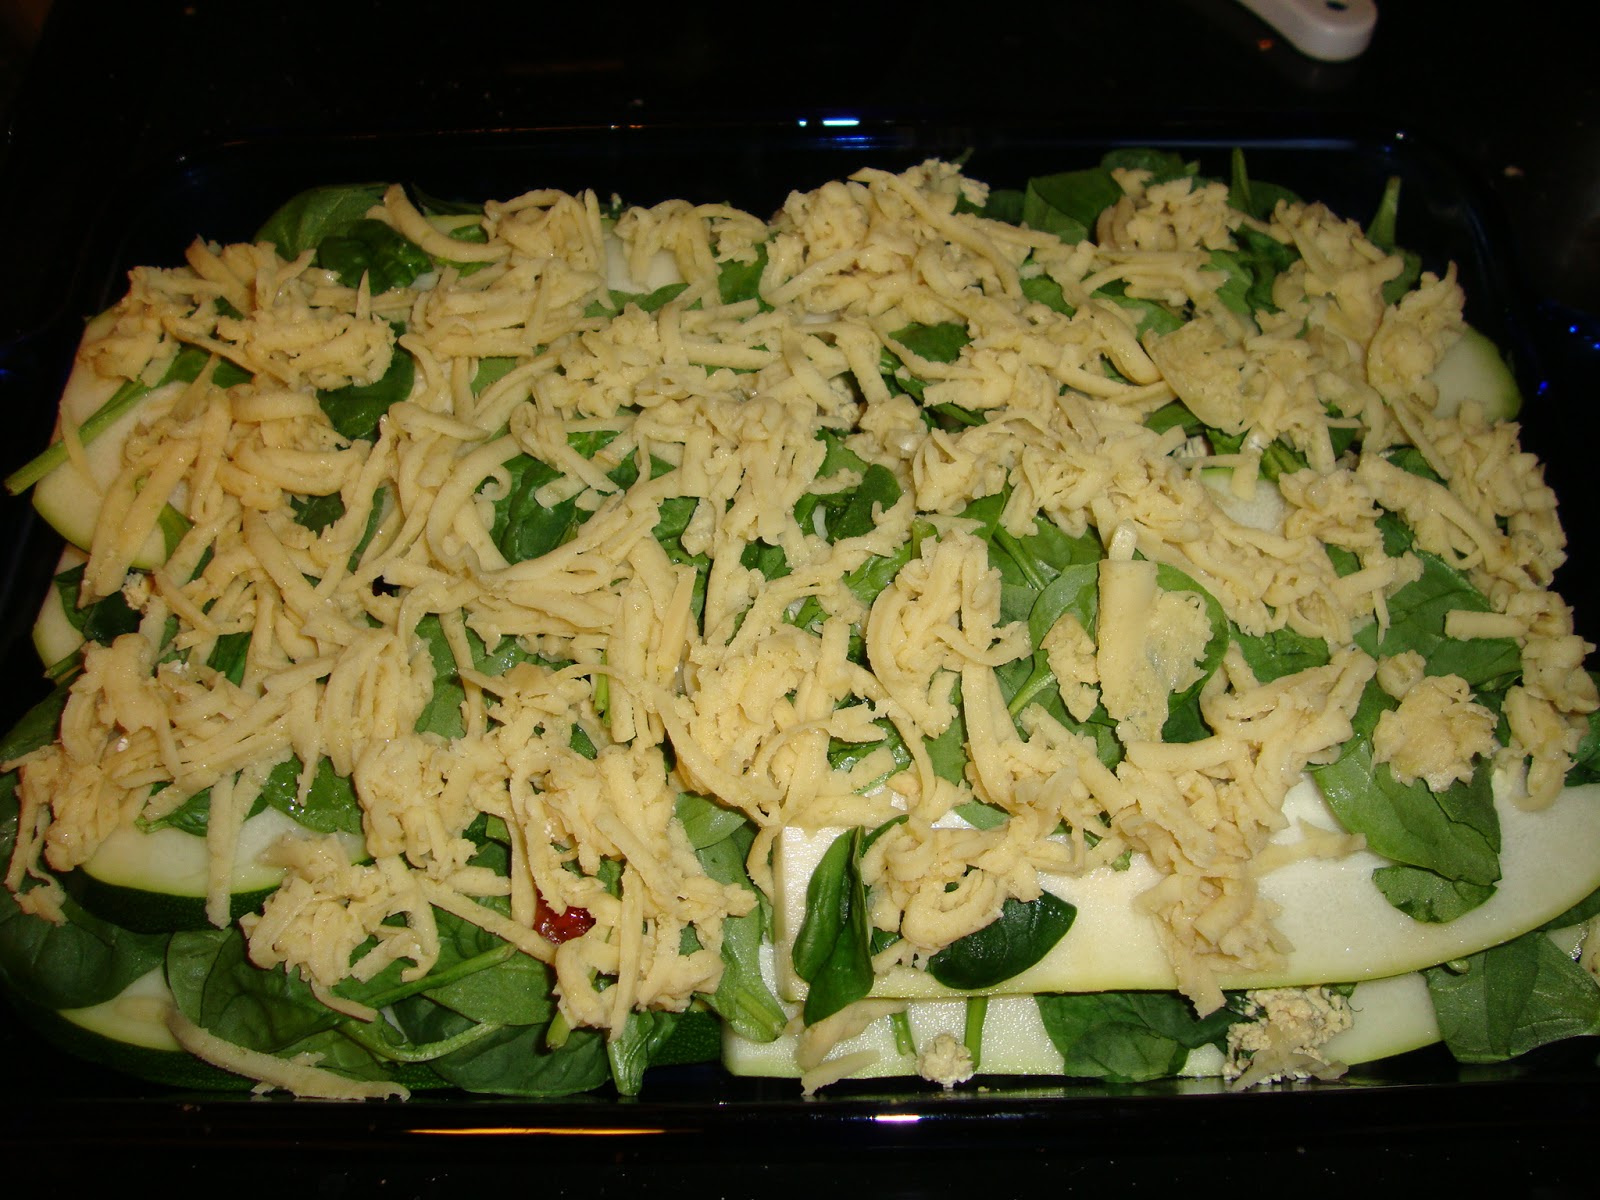
Recipe: Zucchini Lasagna (Vegan, Gluten-Free, Oil-Free, Tomato-Free)


This lasagna doesn't contain any meat, dairy cheese, wheat noodles, olive oil, or tomato sauce. I know that doesn't sound like lasagna anymore, but there's spinach! Omnivores put spinach in their lasagna, right? No, not usually? Oh well, I used a lasagna technique to make it, so I'm sticking with the name.

I'm half Italian. So I (used to) know good tomato sauce. I still miss it, and didn't really want to make a fake tomato sauce from beets and carrots. I've made it before and it's not very satisfying - at least not when tomato sauce is a main ingredient like in pasta. All the recipes I found for a lasagna without tomato sauce were loaded with cheese. I didn't want a heavy, rich lasagna like that. So I came up with this alternative - light but filling, and full of delicious veggies!

The zucchini I used is actually from a friend's garden. And it was HUGE! I should have taken a picture before I cut it, but I forgot. You can see by the size of the noodles I got how big it was. I didn't even use half of the zucchini for this.

The main components of this lasagna are:
  • Zucchini cut into wide, thin noodles
  • Lightly steamed spinach (about 5oz, fresh)
  • Tofu Ricotta by Oh She Glows (I omitted celery, oil, and red pepper flakes)
  • Roasted red peppers (2 peppers, roughly chopped)
  • Artichoke (1 can, roughly chopped)
  • Vegan mozzarella (I changed the flavors a bit for Smoked Coconut Gouda by Vedged Out)
I started out by slicing the zucchini into wide, thin strips and setting them in a colander in the sink. I sprinkled some salt on top and let it sit for a while to release some of its moisture.

To assemble the lasagna:
  1. Place a layer of zucchini noodles in the dish and cover with a bit less than half of the steamed spinach.

  2. Spread half of the tofu ricotta on top, and add half of the roasted red peppers and artichoke.

  3. Add another layer of zucchini noodles and most of the spinach that's left. Cover with the rest of the tofu ricotta, roasted red peppers, and artichoke.

  4. Add the final layer of zucchini noodles and the rest of the spinach. Top with grated vegan mozzarella cheese.

  5. Bake at 400°F for 30 minutes. Serve immediately.

Steve rated this lasagna a 9.2/10! He loved it, and he's not a huge zucchini fan. I loved it too, and will definitely make this again to use up all the zucchini we have.

Monday, July 15, 2013

Solar Cooking: Bran Flakes and Beans

Today was a high of 90°F and very few clouds. Perfect weather for solar baking!

I decided to try out a couple things: cooking dried beans and baking bran flakes. I also made some solar reflectors to concentrate sunlight. I glued aluminum foil to cardboard.


Dried Beans

I found an entry on eHow about how to do this, so I figured I'd try it out. My crock pot is black and the perfect size for cooking 1lb of dried beans. So last night I soaked 1lb of black beans in my crock pot. This morning I drained the beans and added warm water, then I had it outside by 9am with my new reflectors.


I used a glass jar to support the reflectors and keep them from sliding. Eventually I'll come up with a better system.

This was unsuccessful. The water never got hot enough to cook the beans. I highest temperature I measured was 180°F at 3pm when I brought it inside.

I then stuck the pot in my crock pot and turned it on to cook. Unfortunately, I forgot about the beans and overcooked them. Now they're a bit mushy. Eh, whatevs. Mushed black beans are great for taco filling and brownies, so no big loss.

So even though it didn't work, I still think it was worth it to try it out.

I have ideas to build a better solar oven. Hopefully I'll try it out later this week since it's going to continue to be hot.

Bran Flakes

I needed to make Steve some bran flakes to take into work, and these seemed like a great thing to bake outside. Turns out I was right!


I'll post another entry with the bran flake recipe I use. But basically, you mix all the ingredients, roll it out onto some parchment paper, bake that at 350°F for 5-10 minutes (until the the edges get crispy), rip it up into flakes, then bake that at 275°F for 20 minutes (stirring every 5 minutes).

After I rolled out the mix, I let it sit outside for about an hour. Then I ripped it up, and let it sit out for a few more hours. And they were just as good as baking them in the oven! (Ok, Steve said they were a little chewy. So I'll just leave them out a bit longer next time.)

I didn't have to turn on my oven on a 90°F day for it, so that's a success to me!

Saturday, July 13, 2013

Purging Our Lives of "Stuff"

Steve is a minimalist at heart. I'm... getting there.

We want to clean up our lives in a lot of different aspects. We've switched our diet to more clean eating - no processed/boxed foods, very little added oil and sugar, loads of fresh fruits and veggies. I've started to replace our cleaning supplies with more environmentally friendly ones that I make - like baking soda and vinegar. I'm going to start making our toiletries at home out of natural, gentle ingredients. We're taking steps to clean up our energy usage - we just switched our electricity plan with our provider to 100% wind/solar (we're still on the grid, but our energy demand is coming from wind/solar rather than gas/coal).

We also don't want to accumulate "stuff". That stuff that just sits around and has no real purpose or function. Last Christmas I asked my family to not buy me gifts just for the sake of buying me something. I asked for something handmade and personal or something functional. Or nothing, I don't really need gifts. So I didn't get as many gifts as previous years, but I got better gifts in my opinion. My sister gave me a crochet housecoat that she made (and I wore all winter; very comfy!) and a heating mat for seedlings. Those are the kind of gifts I like. The kind of gifts I don't like are a Cars pencil holder that my mom got me one year (I know you meant well, mom!). Several years ago when the Cars movie came out my dad was super into it (and maybe one of my siblings too, I don't remember). So my mom got him a Cars pencil holder, which he loved. Then she bought me and my 3 siblings Cars pencil holders too. "Well, if I get it for one of you I have to get it for all of you!" (This is the same reasoning she used for buying me pretzels dipped in milk chocolate. Gluten, milk... sigh, I can't eat that. I have to give my gift away.) I never opened the box for the pencil holder and I didn't take it home. It sat at my parents' house until they got rid of it. I didn't need or want a Cars pencil holder. It's a great gift for my dad, but not me.

I made all of the Christmas gifts we gave to our families last year - various tea blends, healing salve, nut butters, whole grain mustard, vanilla extract, and a few other things. And I loved making all of it! I was able to tailor the gifts to flavors I knew my family would like - my brother got a curry cashew butter, and my dad got a pistachio/almond butter. I like giving personal gifts like that.

Steve and I are also more conscious of what we buy for ourselves too. We've been tracking everything we've bought for the past few months. This has definitely helped to keep us more accountable.

I have a personal goal for myself that I don't want to buy (or even be given) any new clothes for the rest of the year (underwear being an exception). This isn't a super hard goal because I rarely go clothes shopping, but can be a little challenging since I'm trying to get down to a healthy weight. So instead of buying new clothes if I need something, I want to alter the clothes I already have (like sew in a shirt that has gotten too big) or buy second hand from a thrift store.

If an effort to purge the "stuff" in our lives, we set a goal that each week we're going to get rid of something. Three weeks ago we cleaned out the garage. We got rid of a wheelbarrow, floor lamps, hockey sticks, poker sets, chairs, a baseball bat... Just stuff that sat in the garage because we don't use them anymore. No reason to hold onto them. So we sat everything in our front yard by the road with a FREE sign, and within a couple hours people had taken everything.

Two weeks ago we got rid of a lot of books. We gave them to a lady who will sell them for $1 a piece and then donate that money to the local animal shelter.

This week was clothes.


We went through our closets and got rid of a lot of clothes we don't wear anymore, and organized our summer/winter clothes that we're keeping. This is our haul to Goodwill. I also saved some old t-shirts to make into rags or use to practice sewing projects.


Dr. Quinn helped Steve sort through his clothes by checking their nap-ability. She approves of these.


I also re-discovered these awesome slippers I forgot I had!

Next week I'm going to tackle our toiletries. I know I have old makeup and hair products I don't use anymore that can be tossed.

Tuesday, July 2, 2013

My Garden is Huge


Last week was mostly raining here, with some storming in between. My garden has loved it! Especially after a week of super hot weather.

I have been trying to go out to my garden everyday and keep the tomatoes and cucumbers tied up. With being out of town and the rain not letting up, my garden went a couple days without any maintenance. I spent at least 2 hours just tying up the cucumbers on Saturday. Yes, really. This includes extending the trellis too.


This is a picture of the tamed cucumber plants. The picture on the right shows the two additional pieces of trellis I added. It's hard to see it through all the plant, but I added a wooden panel and a green wire panel on the sides of the bed.


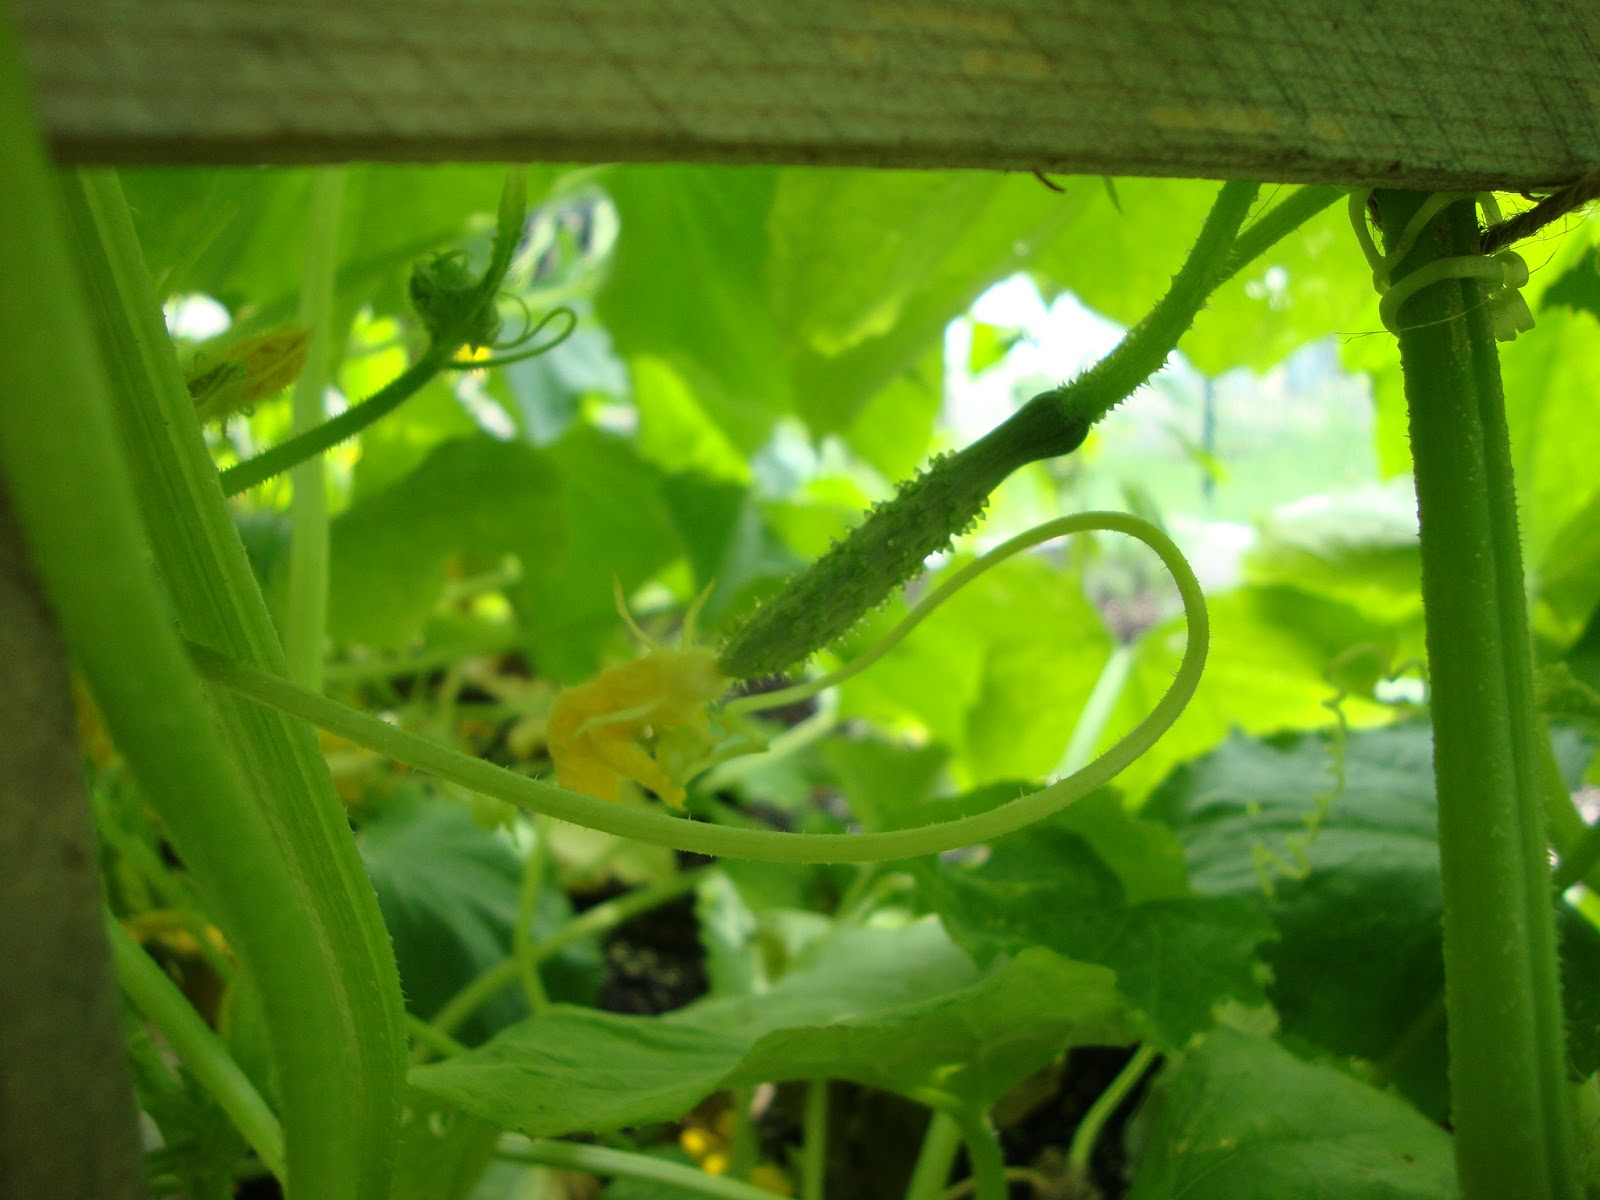
There are lots of baby pickles growing! I'm so excited! There is going to be a lot of pickling in my future. I'll probably start out with sweet gherkins (which is my favorite pickle), so I can pick a bunch while they're still small. Then I'll do dill, bread & butter, relish, all the pickles.


The tomato plants are getting really big too, and there are a lot of green tomatoes. We may have to build some overall support system for them, in case the cages aren't strong enough.


The zucchini plant is getting really high, and the butternut squash is starting to branch out. I put up a short trellis around the butternut to help keep that untangled.


My stevia plants didn't do so well with all the rain. I think the pots were too small, and they were just getting water logged. So I bought some bigger, better draining pots and replanted them. They seem much happier!


I planted some cilantro seeds in the big pot and lavender seeds in the small pot. The cilantro has sprouted, but nothing with the lavender yet.


I started some microgreens and they are doing really well!! I just used empty spinach containers from the market and poked some holes in the bottom for drainage. I'm growing broccoli, spinach, kale, and romaine lettuce. Look at how cute the broccoli and kale sprouts are!

And here is my herb harvest from the weekend. I plan to dry almost all of it - we used all the basil to make pesto and I use some of the fresh orange mint in tea. All pictures are in a 2 quart glass bowl, to give you an idea of the volume.

 
basil (ready to be pesto!) and chocolate mint

 
orange mint and oregano

garlic chives and sage

I have more herbs I need to harvest, but this is about all I can dry at one time. Once these are dry I'll harvest more.


Today I harvested a zucchini and a purple pepper. We used the purple pepper on our pizzas tonight, and I was very surprised to see that the pepper was green on the inside. I expected it to be like red or orange peppers, where it's the color through out. So I was kinda disappointed with this. It tasted like a green pepper, and the purple color went away when I cooked it. I just saw the word "purple" and decided I had to plant it. Oh well, now we know.

Saturday, June 29, 2013

Seitan and Tempeh

This past week I made a big batch of seitan. I tried to make tempeh as well, but that failed. :(

Steve likes to eat seitan sandwiches at work, so I make a big batch of seitan every couple of months for him. I use a recipe for Hickory Smoked Veggie Turkey Lunchmeat from VeganDad. I leave out the oil, and I guess it's still good. Steve doesn't complain (I can't eat it). In the recipe, VeganDad makes the seitan into one big roll. I can't do that because my steamer isn't that big (I use my rice cooker with a steaming tray). I divide the seitan into 4 rolls instead of one big one to make it fit better.

I didn't take a picture of the freshly baked seitan because it didn't look that good. I forgot to double-wrap it (in heavy duty foil) and so it busted open. It didn't look appetizing, but that doesn't change the flavor or texture.

After the seitan is finished cooking I let it sit in the fridge overnight to cool down. It's very difficult to slice it thinly while it is hot. You see that picture on the recipe page, and how it's very pretty and thinly sliced? I can never cut it that thin, and I don't know how he does it. I read somewhere to slice the seitan while it's frozen. I tried that and it didn't work for me. Maybe my knives are too dull? I don't know.


Here is my finished product. After I slice it, I put them into zip-lock bags. Each bag will last Steve about 1 week of sandwiches at work (2-3 slices per sandwich). That's 9 full bags, one bag of the nubby ends of the seitan rolls (I usually add that to Steve's soups), and one bag that has enough for 2-3 sandwiches. I put all the bags in the freezer. On a Sunday night I'll grab a bag and stick it in the fridge to thaw overnight. Then Monday morning Steve takes it into work.

This one batch (I didn't even double the recipe) makes enough to last for over 2 months. This is my kind of recipe!

And the tempeh... so sad that didn't turn out. I even took pictures of the whole process to explain it all. I've made it once before a few months ago. I did a couple things different this time, so something I did must have messed up the tempeh. I tried to double the recipe and I tried to ferment it in tupperware containers instead of zip-lock bags. Doing a double batch was definitely a bad idea. It's just too much to work with. And de-hulling all those soybeans was such a pain!! But I've got an idea for an easier way to de-hull which I'll try out next time.